Finding My People

Posted on

I suppose that even though I sort of dove into this quilting thing head first I am still “new” to quilting. I have technically only owned a sewing machine for 2 years and it’s been about 18 months since my first quilting class began. Still, I’m pretty into

I saw this online one day and it could happen...

I saw this online one day and it could happen…

it. Like really into it. So I decided that it was time to join a quilt guild and I discovered the Calgary Modern Quilt Guild on Facebook. I also discovered that my friend Erin over at Basting Beauty was also thinking of joining so we piled into my car and off we went. I want to imagine that we arrived all cool and confident and ready to talk about fabric and thread and battings and such. In reality we were pretty nervous – well at least I know I was! What does one even talk about at a Quilt Guild meeting. Well, I suppose it makes sense that they just talk about quilting. The night we were there they had a demo on paper piecing – something I definitely want to try very soon! There was a show and tell portion of the evening and oh wow there is some serious talent amongst these ladies! Even though the talent was pretty intimidating everyone was welcoming and I think I’ve found my people!! This is pretty cool because I sometimes feel like I have spent most of my life on the fringe of things. I’m never really the popular girl who fits in easily into groups – I’m way too nerdy and awkward for all of that. It doesn’t bother me – I am blessed with some of the best friends a girl could ask for but it’s still nice to find a group where you can discuss your passion.

Many of the members were away at Quiltcon so I’m not even sure that we had the full experience but it’s ok because in a week we will go to our next meeting and I’m sure we will be even more overwhelmed! At this meeting we will exchange mini quilts and I’m completely terrified that my mini isn’t really up to par but I’m gonna do it because #yolo. (I’ve also recently decided that this term must live and so I have resurrected it.)

I don’t have any quilts to share at the moment – I picked a baby quilt up from the quilter today so on the weekend I will share pics – I promise. I also have a VERY important quilt project on the go and it has consumed most of my quilting time since the middle of January but I am happy to report that I am making awesome progress on it and you will get to view its splendour soon.

Put a Label on It!

In my very first quilting class they talked about labelling your quilts. I will be the first to admit that I may have thought – but why?! And my first few quilts – likely more than a few – were not labelled. I am just going to trust that those people will love my quilts and just remember how much effort and love I put into their quilts! But then I started making quilts that were getting more difficult to give away. I was becoming more attached to my art work. I was actually making art work in my quilts.

Each quilt I make is inspired by a number of things. Sometimes I see a fabric line that I MUST have and then I will search for a pattern that suits it or that will feature the fabric in a way that seems suitable. I also have a quilt pattern obsession and I love to troll the inter webs for new pattern ideas. Other times I will have a need to make a quilt for a specific person for a special occasion and I will spend hours (like literally hours) finding or creating just the right combination of fabric and pattern. Typically this will involve trying a new technique or just playing with a new idea.

My quilts feel more and more like my art and they are definitely a product of my own creativity. So… I decided to create labels for the quilts. I had a graphic designer help me create a label and then I printed them at Spoonflower. I had a fat quarter printed and it will be enough labels to make 25 quilts so I should be good for a while!

I played with ideas to attach the labels and I have decided on a rough edge appliqué method where I use HeatnBond iron adhesive so that the label can be attached that way and then I also sew around the edge. They look like this:

IMG_1706

I am really happy with how they look on the quilts and I am excited to put them on all of my future projects!

That being said – I gifted a quilt to someone recently and an observer scoffed at the idea of my label. It was interesting. I calmly explained that my quilts are my art and we would not expect an artist to leave her work unsigned. The observer seemed to understand at that point and I was happy to be able to educate someone about quilting.

So there you have it folks, put a label on it!


In case you were wondering…

I’m alive!

I’m just really terrible at staying up to date with this blog situation. I’m not even going to do the cliche New Year’s thing where I promise to be better. I’m just gonna be me and that will have to be enough.

Truthfully, I am probably updating this right now because I don’t want to be writing report cards. This is what procrastination looks like.

Even though I did not make a resolution for 2015, I did make one last year. My 2014 New Year’s resolution was to make 12 quilts in 12 months. Technically I didn’t quite make all 12 but let me explain.

Quilt 1:

You all remember this beauty – it was one of my most popular quilts of the year. It happily resides at my dad’s house now. Yes, my dad purchased this quilt at a silent auction. I told him that I would make him one for free but he insisted. Who am I to argue with my own father?!

photo (1)

Quilt 2:

This was a quick panel quilt for a very dear friend’s little boy for his first birthday. I blogged about this one too so not much to say here.

IMG_1137

Quilt 3:

I also blogged about this one. I won’t ramble…

IMG_1168

Quilt 4:

Yep – you know about this one too! It should be noted that my other half seems to hate this quilt. Apparently he isn’t into vintage looking quilts. This is all good information because I haven’t made a lot of quilts for our house yet so now I know that I should make modern quilts if I require his approval, which I don’t, but sometimes it’s nicer to have someone admire a quilt than it is to have them fold it away constantly! He means no harm – it’s kind of nice to know that he has an opinion about them.

IMG_1297

Quilt 5:

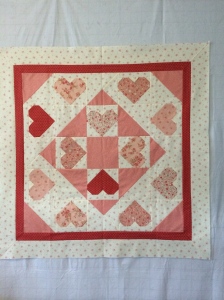
I don’t have a nice photo of this one after it was all bound and delivered. I don’t even have a good excuse as to why there is very little photo documentation of it. I was in a hurry to deliver it, perhaps. I do adore the little hearts on this one.

IMG_1284

Quilt 6:

Another one that I don’t have great photos of. Maybe we are seeing a theme here. It may also explain my lack of blogging about quilts. When all you have are semi-horrible iPhone pictures… I do love these little owls.

IMG_1460

Quilt 7:

This was my first foray into the world of half-square-triangles and I really liked how they made the chevron pattern. I don’t have any great pictures of the quilting but it was done with little bumble-bees!

IMG_1639

Quilt 8:

Another horrible picture. Maybe I should have asked for a camera for Christmas… But I digress. I love this quilt. I used a panel and a fat quarter bundle and it whipped up really quickly. I also quilted this one on a long arm machine and I used a freehand design to accent the fairy. You can see a picture of the wings.

IMG_1660IMG_1693

Quilt 9:

I have pictures of this one finished but for some reason right now I can only find this picture of this one on my design wall. The patterned fabrics have penguins, whales and polar bears on them. Swoon.

IMG_1665

Quilt 10:

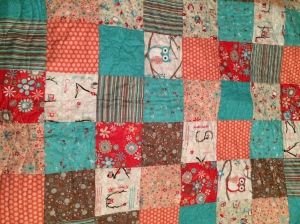
Remember that owl quilt (#6), well this is the same fabric line. I had a fat quarter bundle kicking around so I threw this little beauty together for an intern teacher we had at our school for the fall. The end result was one of my favourites. It was SUPER quick to put together – just a stack of 6 1/2″ squares tossed together.

IMG_1712 IMG_1707

Quilt 11:

Another adorable baby quilt!

IMG_1514

And actually there is not a Quilt 12. I am almost done binding a mini quilt that could have been #12 but it just didn’t quite get done. It will be done soon and if it’s still report card season you can expect an update! 😉 I also have two other quilt tops done so when they are all quilted and bound I will take more crappy photos for you to enjoy!

So that was 2014 in quilts – quite a year considering I had only completed 2 quilts before this – I started learning how to quilt in September of 2013 so I am REALLY proud of my progress so far.

I have some AWESOME projects on the go already in 2015. They are pretty much top secret at the moment so I can’t really blog about them and even if I could I probably wouldn’t be all that great about updating so no stress.

I hope 2015 brings you joy and opportunities to explore your creativity!

<3,

Rachel

Finally!

Posted on

Phew! That break from blogging was too long! My apologies.

I had every intention to blog over the past few months – really.

In April I had foot surgery. I had a bunionectomy to be exact. In preparation for this event I prepared a quilt right up to the final hand stitched binding and that was going to be my big project while I convalesced. However, I did not anticipate the fact that lugging a rather large quilt even short distances would be nearly impossible whilst on crutches. Live and learn, friends. Live and learn.

I’m happy to tell you that said quilt is complete and gorgeous and I am going to share it with you today!

imagesWay way way back in winter I signed up for a quilt class to learn how to set diagonal blocks, do mitred corners, and make a scalloped edge on a quilt. Around the same time I spotted this fabric line on the Fat Quarter Shop and I knew that this fabric was made for this quilt. The aqua and red combination was so striking and had the same vintage feel that the quilt pattern had.

So I set to work cutting and piecing and prepping this lovely little number. It was actually a very quick quilt to piece. If memory serves me it took about 4-5 eight hour days to make this quilt from start to finish and most of that was done in the classroom. I discovered how much I like the diagonal setting and how easy it is! The mitred corners were also really simple and I will definitely use them again.

Thanks to a fancy ruler the scalloped edge was also pretty simple. They also continue to marry my love of math and quilts at the same time which I always enjoy!IMG_1296

I had the quilt professionally quilted by a quilter who lives just down the road from me – how handy is that?! (I may or may not have dropped off two more quilts today!) I chose a large scale floral pattern that (hopefully) mimics the dahlias in the fabric. Also note: polka-do backing. Don’t mess with a good thing.

IMG_1300

Full disclosure – the quilt was all ready for hand sewing in April and then it took me all this time to get the binding done. It’s shameful. When I was off my foot and resting on the couch the quilt was always just out of reach or on a different floor of the house. On crutches the quilt might as well have been in a different galaxy. Even if I mustered the energy to go and get it I had to face the fact that a large quilt (it measures approximately 73″ square) was tough to transport on crutches. So I let that dream go and I worked on a gorgeous alpaca scarf that will be adorable this winter – finally a knitting project for myself!

I can read your minds. You are thinking , “It’s been three months, what took so long?!” When I finally lost the cast and crutches it was early June and the very last thing I wanted to do was sit down for another second. I wanted to walk and cut fabric and sew and even press a new project or two. There was to be no sitting.

And then the weather got nice. And then I started teaching an online course at the University. And then life is just such a busy place. And (let’s just be honest here) hand stitching binding is not a choice activity for this girl. It (sadly) falls pretty low on my list of “Things I Like to Do” but this week I got a little tough on myself and insisted that this quilt deserved to be enjoyed and seen by the world. Am I the only quilter that struggles at this stage? I sometimes wonder if I’m doing it wrong or something. IMG_1297

Double Dog Dare

Posted on

Just before the holidays I was finishing my first quilting class and I told my instructor that my New Year’s resolution was going to be finishing 12 quilts in 12 months. Her response, “They take longer than you think.” So basically I have accepted her double dog dare to actually do this. So today we celebrate Finish #3! Woohoo! You just watch me finish these 12 quilts. Also, there are three babies joining my little world in the next 6 months so I figure that babies need an abundance of quilts so this should be a fun challenge.

I know that you have seen pics of this one along the way so I will just throw in a couple of quick shots but you just needed to see it all done because it’s pretty fantastic. And note: The backing technically has a polka-dot in it. Can’t resist.


IMG_1168

Green Baby Quilt

IMG_1170

Notice the polka-dots!


This week my quilt labels also arrived! Earlier in the year I had a graphic designer create a label for me and then I ordered them on Spoonflower. I know that it might seem weird to label a hand made quilt but this is my art and I want my “signature” on it. I am hoping to cut these out in circles and attach them to the bottom right corner of the back of each of my quilts from now on.

IMG_1171

Quilt Labels


Also, this adorable fabric found its way into my sewing room this week so I will be playing with it in the days to come. Stay tuned!

IMG_1163

Adornit Nested Owl in Coral

Finish {#2}

Posted on

It turns out that when I blog about projects I can make things happen! Here we have 2014’s second quilt finish! I have probably worked on this project for way too long – after all, it is just a panel with borders but for some reason I got caught up in the final stages. Forgive me! Here’s hoping that the quilt’s recipient will forgive my tardiness with his first birthday gift and that it doesn’t stop him from enjoying his new play mat.

I figured out a way to sandwich my panel quilt in the limited space of my sewing room.  I just did it in sections which seems to have worked just fine although this is the largest size quilt I could sandwich that way. My other half is unwilling to sell our house and move to a place with a bigger sewing space so that I can own my very own long arm machine so this will have to do for smallish quilts at home for now!

Once sandwiched it was time to quilt and I decided to incorporate a few different (and new to me) quilting pattern techniques. On the body of the quilt I decided to just use a meandering swirl with this rainbow thread I spotted at the quilting store. I subsequently discovered that you haven’t really

Meander quilting with rainbow thread.

Meander quilting with rainbow thread.

lived until you have quilted with rainbow thread and I may struggle to quilt with anything but rainbow thread in the future.

Water Quilting

Water Quilting

I had originally picked blue and yellow for the borders so that I could highlight these colours in the quilt and to mimic water and sunshine so I wanted to bring that into my quilting. On the blue border I used a quilting motif that replicates water and I really like how it turned out!

On the yellow I wanted to play with the idea of sunshine so I decided to use a continuous swirl. I had to practice this one a little because it requires some forethought to make them look uniform and as intended. Once I got in the groove they took shape fairly easily but I am mildly concerned that they look more like yellow snails than suns. I am really hoping that the quilt’s 1 year-old recipient isn’t somehow deeply offended by yellow snails.

Sun (Snail??) Quilted Border

Sun (Snail??) Quilted Border

Have we talked about how much I love a good polka-dot backing? Well, I do. I could pretty much find a polka-dot backing to suit any quilt and I usually do. I need to consider digging deeper into my psyche to figure this out. But here’s the thing: The polka-dots look fantastic on any quilt. See?

Polka-dot Backing

Polka-dot Backing

So this quilt will hit the post later this evening and ideally arrive in a couple of weeks across the pond to its very handsome new owner and I hope he will play with his little cars on it for years to come and that it may also provide some love and comfort from Canada.


IMG_1137

The final product!


Spring Quilting

Posted on

So I am really trying to make a go of this blog situation but I am really terrible at regular updates. I am struggling with the idea that quilting takes away from the time I could blog about quilting. It’s a quandry for sure.

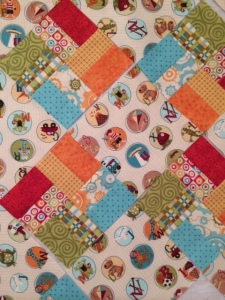
But alas, here I am and I want to tell you about this week’s new project! Yes, I have two other “things” on the go right now.  One of them is done being bound and I can tell you all about it next week and the other is getting ready for binding. The one I really want to tell you about is a little something I started about a week and a half ago. I was asked to make a baby quilt for a colleague who’s wife is expecting soon so I made a trip to the quilting store to find some really great fabric for a baby boy. This is where being a quilter really comes in handy! It seems like there are a lot more products marketed to little girls.  I found this great feature fabric and on Monday I had hoped to just get the cutting done but then I started sewing and before I knew it I was almost half done piecing!

photo (9)

Adorable fabric with coordinating blocks

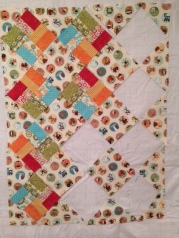
The store also had a few of the fabrics from the same line so I added those in and only had to find about 4 more to add.  This is how it looks up on the design wall. I am loving how the colours are blending with one another and yet also showcasing the wide variety of colours in the feature fabric.


photo (8)

Design wall from a step back


So then spring break started and I needed to finish this quilt because today I was headed to Sparrow Studioz to learn how to use the longarm quilting machines so that I can rent them in the future. I think that I had forgotten how quickly a baby quilt can come together because it was only a couple more hours of piecing work and I had a quilt top.

photoCA446134

Quilt top


And then I successfully quilted it on the long arm machine which was fun like nobody’s business! We used a pantograph which is essentially tracing a pattern on to the quilt and it only took an hour from start to finish and I am officially hooked on quilting this way. It looks so professional and you can’t argue with the time saving. So there is just the binding to do which can take me anywhere from a day to a month depending on how motivated I am.

Look at that quilting!

Look at that quilting!


{Full} of Pride

Posted on

Oh my goodness – what a week it has been!  A little over a week ago I made the treck to my home town to pick up a quilt that a very gracious quilter had completed for me.  It’s a pretty special quilt because it will be going in to a silent auction at the Kids Cancer Care Parents’ Quest for a Cure Gala on May 8.  So, no pressure, this quilt is my most important to date.  I started working on this on January 1st – I wanted it to be my first finish of 2014.  I’m a nerd like that.

Just before the holidays I was at the quilt shop during a quilt along and spotted these kaffe facett pre-cuts that were exactly 6 1/2″ wide which was the exact width I would need to create this quilt pattern that I had fallen in love with a few weeks before.  Throw in some very subtly gray cotton sateen and I had all of the ingredients for awesomeness.

photo (3)

Pendants on the design wall.

As I started cutting the pendants and putting them up onto the design wall it was pretty clear that this was going to be a stunning project.  The colours just look so fantastic together and the pendants really let you showcase large prints in a way that tiny quilt squares don’t.photo (5)


The ‘rows’ which are more like columns actually came together in a weekend and then I started the sashing.  This is where life got a little weird.  Because the triangles that join the pendants are cut as half square triangles the long edge that runs along the sashing happens to be a bias (ie. super stretchy direction) edge which made them really stretchy and because the pieces need to be handled quite a bit they went all wavy and wonky on me.  The sashing is cut length of fabric (ie. no stretch) so they helped to smooth things out but then there was this issue of squaring up the quilt when the ends were all different lengths.  I ended up having to cut at least 6 inches off of each end before the quilt was square.  I think I probably lost 6 days of my life stressing about this process.  You haven’t known anxiety until you have to hack away at the end of a beautiful quilt top in order to square it up.  Really. The next time I make this quilt – and there will be a next time – I will make cut the triangles so that the long edges are not on the bias.  Lucky for me I like math and I’ve already calculated how this will work. The borders helped to really square everything into place and forgive all of those wonky edges.

photo (7)

Acorn Backing

I chose this adorable acorn fabric (also a kaffe fassett design) for the backing.  I liked how the long ribbons of acorns mimicked the long sashing and pendants on the top.  And who doesn’t love tiny acorns?

So off to the quilter it went and when I picked it up again a little over a week ago I was pretty overwhelmed with how amazing it had turned out.  I had just told the quilter to go ahead and do an all over design – something quick that would not be too heavily quilted.  Lucky for me I found a really great quilter who custom quilted it as a donation to the auction.  And she used this gorgeous wave pattern in the sashing and borders and a floral in the pendants.  It will be very difficult to quilt on my little machine from now on – my little machine and I don’t have these skills.  I really wanted to hand sew the binding so that the edges would look really clean and gorgeous.  That meant that I had to bind a twin sized quilt in a week.  Hand binding is not my talent, well it wasn’t until this week.  It took me 20 hours this week to get all of that done.  Did I mention that I have a day job??  My dogs even cooperated and played nicely all week so that I could get this done.  The result is pretty much my proudest quilting moment to date.
TADA!!!!!!!

photo (2)photo (4)

I can’t wait to deliver this quilt to the auction people tomorrow.  I hope that it fetches a fantastic price – maybe there will be a quilt lover in the crowd?  So pretty much nothing tops the pride and joy of putting my quilting to work for a cause that I believe in so passionately.


{In} Progress

I currently have three quilt projects on the go.  And if we are going to be really technical there are 4, but who’s counting.  I have a quilt that needs about 20 ninches of binding hand sewn and it is just sitting there staring at me.  This weekend it’s going to get done.  Really.

A quilt that I am making for a charity auction is at a machine quilter’s place getting all its fancy quilting stitched on it and I will share it as soon as it’s back and all bound and living its magnificent quilt life.

I have another very adorable project on the go.  It’s a play mat for a very special little person for his first birthday. I don’t want to ruin too many surprises so I won’t go in to too much detail about all of that but here is a picture of the quilt top up on my design wall:

Play mat quilt top

Play mat quilt top

This was my first experience making a quilt with a panel.  I liked this one because it seemed very “Canadiana” with its mountain scenes and such.  I added the blue and yellow borders to add interest and why wouldn’t you want to add borders?  The panel wasn’t perfectly square even after I trimmed it down (shudder) so the borders helped to square things up and pull in all of the sides a little.  Love how borders do that.  I will admit that the panel made this project FAST (obviously!).

The backing (black with white polka dots!!!) and binding are all ready to go, I just need to sandwich and quilt it and we will be in business!  I have yet to configure a way to effectively sandwich quilts at home.  I don’t have a table big enough and even though I could technically use my kitchen table and just baste in sections I don’t really want tiny safety pin scratches all over my kitchen table.  In the past I have just taken my quilts to the quilting store where I take classes and use their big glorious tables for this purpose but my day job interferes with this plan.  It’s likely that I could just do this on a piece of floor but then I would have dogs and an aging back to contend with.  I am going to give this situation its own hashtag, #quilterproblems.

Later this weekend I will share project #4 which is a stunner!  I am making it to learn how to do scallop edging and mitered corners – just you wait and see this little looker!


Addiction

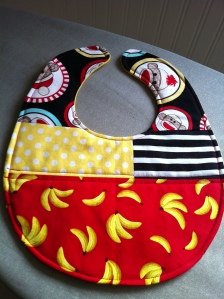
So. The sewing machine.  I bought it for myself for my birthday last spring.  It was a bit of an impulse purchase because I had not sewn since grade 7 (when my teacher asked me to never take her class again) and I wasn’t even sure what I wanted to sew.  I found it on Kijiji – someone who thought they would sew with 4 small children in the house and it came to me “used” still sealed in its box.  My first major project was a set of baby things for a dear friend across the pond.  I found this gorgeous fabric on The Fat Quarter Shop (we shall speak of this place many times):

Socky by Windham Fabrics

Socky by Windham Fabrics

And then I started “pinning” baby things on Pinterest (another place we will speak of many times) much to the joy of the people in my life who think I should have small versions of my own in the house.  Imagine the disappointment they must feel now realizing that it really was just for interest sake and not because I had any specific plans.

I decided to make a few things…

A blanket from this tutorial, some of these bibs (which are completely genius BTW), a few of these burp cloths, and some pacifier clips like these.  Sadly I don’t have many pictures of these creations because it was nearly a year ago and I am terrible at remembering to take photos of my creations.  This blog is going to help me remember to document the process better. I promise.  Here is one of the bibs:

photo

Thank goodness for these lady bloggers and their amazing tutorials because I was able to go from, “How do I thread my machine?” to “I made a bunch of stuff for an adorable baby!” in just a few weeks.

So yes, that is where this sewing/fabric/Pinterest addiction began.